Automating RBAC Role Assignments with Azure Policy and Terraform
Role-Based Access Control (RBAC) stands as a critical security feature within the Microsoft Azure platform, affording administrators the ability to efficiently manage access to Azure resources. RBAC enables organizations to exercise control over resource-specific actions by assigning roles to users. Yet, manually managing RBAC assignments in large-scale environments can prove burdensome. In this blog post, we will explore the automation of RBAC role assignments based on resource tags by leveraging Azure Policy and Terraform.
Prerequisites:
Before delving into the automation process, please ensure you have met the following prerequisites:
- An active Azure subscription.
- The Azure Command-Line Interface (CLI) installed.
- Terraform installed and properly configured on your local machine.
Azure Policy Schema:
We will commence with the following schema as a basis for our policy:
resource "azurerm_policy_definition" "tag_based_role_assignment" {
  name         = "tag-based-role-definition"
  display_name = "Tag-based Role Definition"
  description  = "Assign RBAC role based on specific tag"

  policy_type = "Custom"
  mode        = "All"

  metadata = <<METADATA
 {
   "category": "RBAC"
 }
 METADATA

 policy_rule = {}
}
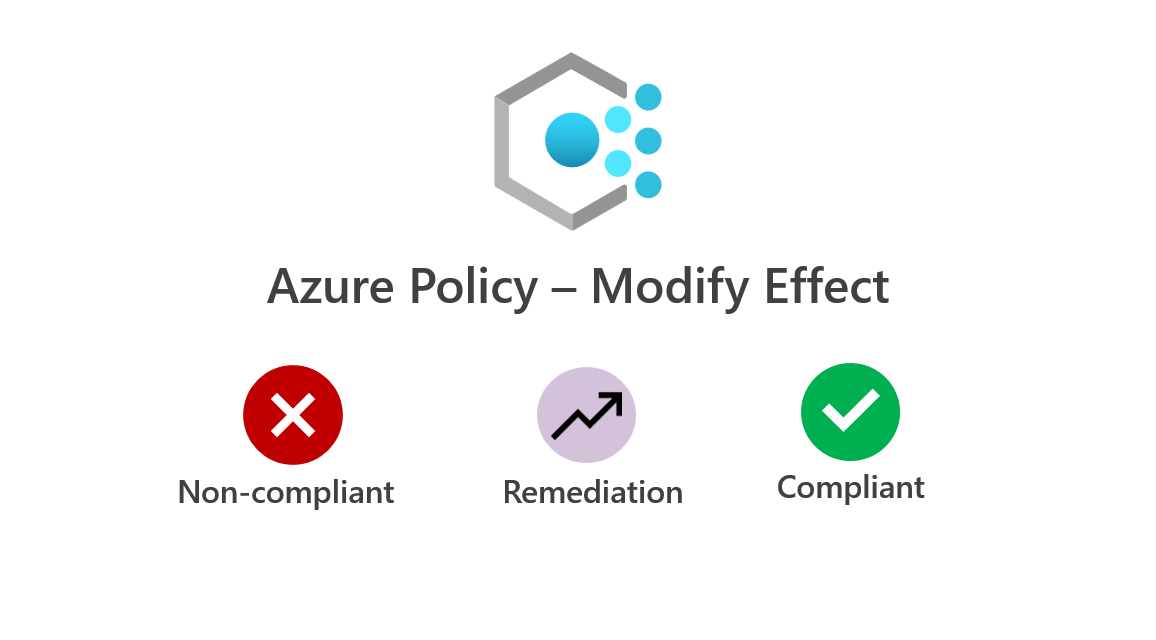
The “if” block within the policy_rule{} contains two or three sub-blocks, depending on the policy’s effect. In this instance, we are using the “AuditIfNotExists” effect, necessitating only the “if” and “then” blocks. The condition checks against specific tags under a resource group and is expressed as follows:
{
    "if": {
      "allOf": [{
						"field": "type",
						"equals": "Microsoft.Resources/subscriptions/resourceGroups"
					}, 	{
						"field": "name",
						"like": "rg-sk*"
					}, {
						"field": "tags['Environment']",
						"equals": "Prod"
					}
				]
    }
The above code uses the “allOf” logical operator, evaluating each field’s conditions. In this context:
- We verify the type against “Microsoft.Resources/subscriptions/resourceGroups.”
- We check for a resource group whose name begins with “rg-sk.”
- We ensure the presence of a “Environment” tag with the value “Prod.”
Only when all three conditions are met will the “then” effect be triggered, as discussed next.
The “then” block is of utmost importance, defining the effect and action to achieve compliance:
"then": {
      "effect": "AuditIfNotExists",
      "details": {
        "type": "Microsoft.Authorization/roleAssignments",
        "name": "Tag-based role assignment",
        "roleDefinitionIds": [
          "/providers/microsoft.authorization/roleDefinitions/18d7d88d-d35e-4fb5-a5c3-7773c20a72d9"
        ],
        "existenceCondition": {
          "allOf": [{
                  "field": "Microsoft.Authorization/roleAssignments/roleDefinitionId",
                  "equals": "/subscriptions/<subbscuription_id>/providers/Microsoft.Authorization/roleDefinitions/b24988ac-6180-42a0-ab88-20f7382dd24c"
                }, {
                  "field": "Microsoft.Authorization/roleAssignments/principalId",
                  "equals": "<Azure AD Group principal id>"
                }
              ]
        }
The “effect” is set to “AuditIfNotExists,” resulting in resource state logging when it deviates from the values specified in the “if” block. This enables effective auditing of compliance against custom policies. Additional information about effects and their use in different environments can be found on the Microsoft Learn site.
The “details” block includes crucial elements for verification or remediation. Notably, “roleDefinitionIds” grants the Policy permissions on the Azure resource to facilitate applicable changes. For instance, we utilize the “User Access Administrator” role in our scenario, adhering to the principle of least privileged access.
The “existenceCondition” sets the compliance condition. In this case, we use “allOf” to ensure multiple values are applied. These values include an RBAC role (such as “Contributor“) assigned to the principal ID of an Azure AD group.
Having discussed the auditing aspect (“AuditIfNotExists“), let’s explore extending the example to include remediation through “DeployIfNotExists.” This approach offers a powerful means of achieving compliance. In such a scenario, an additional “deployment” block is required, containing the Azure Resource Manager (JSON) template for implementing the change:
"deployment": {
          "properties": {
            "mode": "incremental",
            "template": {
              "$schema": "https://schema.management.azure.com/schemas/2015-01-01/deploymentTemplate.json#",
              "contentVersion": "1.0.0.0",
              "resources": [
                    {
                        "type": "Microsoft.Authorization/roleAssignments",
                        "apiVersion": "2022-04-01",
                        "name": "[guid(resourceGroup().id)]",
                        "properties": {
                            "roleDefinitionId": "[concat('/subscriptions/', subscription().subscriptionId, '/providers/Microsoft.Authorization/roleDefinitions/', 'b24988ac-6180-42a0-ab88-20f7382dd24c')]",
                            "principalId": "<Azure AD Group principal ID>"
                        }
                    }
              ]
            }
          }
        }
To consolidate everything, here is the complete custom policy code placed within the main.tf file:
resource "azurerm_policy_definition" "tag_based_role_assignment" {
  name         = "tag-based-role-assignment"
  display_name = "Tag-based Role Assignment"
  description  = "Assign RBAC role based on specific tag"

  policy_type = "Custom"
  mode        = "All"

  metadata = <<METADATA
{
  "category": "RBAC"
}
METADATA

  policy_rule = <<POLICY_RULE
  {
    "if": {
      "allOf": [{
						"field": "type",
						"equals": "Microsoft.Resources/subscriptions/resourceGroups"
					}, 	{
						"field": "name",
						"like": "rg-sk*"
					}, {
						"field": "tags['Environment']",
						"equals": "Prod"
					}
				]
    },
    "then": {
      "effect": "DeployIfNotExists",
      "details": {
        "type": "Microsoft.Authorization/roleAssignments",
        "name": "Tag-based role assignment",
        "roleDefinitionIds": [
          "/providers/microsoft.authorization/roleDefinitions/18d7d88d-d35e-4fb5-a5c3-7773c20a72d9"
        ],
        "existenceCondition": {
          "allOf": [{
                  "field": "Microsoft.Authorization/roleAssignments/roleDefinitionId",
                  "equals": "/subscriptions/<subscription id>/providers/Microsoft.Authorization/roleDefinitions/b24988ac-6180-42a0-ab88-20f7382dd24c"
                }, {
                  "field": "Microsoft.Authorization/roleAssignments/principalId",
                  "equals": "<Azure AD Group principal ID>"
                }
              ]
        },
        "deployment": {
          "properties": {
            "mode": "incremental",
            "template": {
              "$schema": "https://schema.management.azure.com/schemas/2015-01-01/deploymentTemplate.json#",
              "contentVersion": "1.0.0.0",
              "resources": [
                    {
                        "type": "Microsoft.Authorization/roleAssignments",
                        "apiVersion": "2022-04-01",
                        "name": "[guid(resourceGroup().id)]",
                        "properties": {
                            "roleDefinitionId": "[concat('/subscriptions/', subscription().subscriptionId, '/providers/Microsoft.Authorization/roleDefinitions/', 'b24988ac-6180-42a0-ab88-20f7382dd24c')]",
                            "principalId": "<Azure AD Group principal ID>"
                        }
                    }
              ]
            }
          }
        }
      }
    }
}
POLICY_RULE
}
Finally, to apply the policy at the appropriate subscription and enable remediation, use the following code:
resource "azurerm_subscription_policy_assignment" "tag_based_role_assignment" {
  name                 = "tag-based-role-assignment"
  subscription_id      = var.scope //this is your subscription id
  policy_definition_id = azurerm_policy_definition.tag_based_role_assignment.id
  location = "West Europe"
  identity {
    type         = "SystemAssigned" //the assignment will need to have an identity (system or used managed) which can be used to assign the User Access Administrator RBAC role.
  }
}

resource "azurerm_subscription_policy_remediation" "rbac_remediation" {
  name = "tag-based-role-remediation"
  subscription_id = var.scope //this is your subscription id
  policy_assignment_id =  azurerm_subscription_policy_assignment.tag_based_role_assignment.id
}
After applying the code successfully, the output on the Azure portal should look something like this:

Sometimes this output doesnt take effect straight away, Azure policy evaluation runs every 24 hours but can be enforced using the following command targeting at a single resource group:
az policy state trigger-scan -g "<resource-group-name>"Or you can run the policy trigger without a scope which would evaluate all resource groups in its path.
Automating RBAC role assignments in Microsoft Azure is critical for upholding security and governance in your cloud environment. By leveraging Azure Policy and Terraform, you can effortlessly enforce RBAC roles based on specific tags, ensuring appropriate access control for resources.
Throughout this blog post, we have outlined the process of creating a custom Azure Policy definition and implementing it using Terraform. By following these steps, you can streamline the management of RBAC role assignments and maintain a secure and well-organized Azure infrastructure. Happy automating!
[Event] Azure Cloud Adoption & Well-Architected Framework
I will be running a webinar on behalf of UK Cloud Infrastructure User Group on the 27th of October @ 6 PM UK time. Please join me to take you through both Microsoft Cloud Adoption and Well Architected frameworks.
To register for the event: https://www.meetup.com/en-AU/UK-Cloud-Infrastructure-User-Group/events/273793787
I hope to see a lot of you there.
Zero Trust approach

We talk a lot about security and protecting ourselves from external threats, threats started to emerge from inside your enterprise fence, hence protecting your business assets became a necessity. The question we hear a lot now is how do we protect our business? The answer is by embracing the “Zero Trust model”.
So, what is “Zero Trust model”? I hear you say! It is a set of rules and principles that dictates the way we should look at our identity, network/data and infrastructure security, and devices (both corporate and with companies implementing BYOD).
Lets look at those principles in more detail and define a simple strategy in setting our goal for more secure environment without impeding productivity.
Identity – people when they hear identity they think of two-factor authentication straight away, problem solved! or is it? Unfortunately, it’s not as simple as implementing 2FA or multi-factor authentication (MFA), it’s about knowing who, what, where and which:
Who – who are you in the context of a username and password, a lot of business are going passwordless (i.e. bio-metrics)
What – what device are you using to access, does the device comply with company policy (such as patches, anti-virus etc)
Where – where are you accessing from (i.e. geo location), are there any anomalies, such as login attempt from distant geo locations in a short period of time.
Which – which service/data are you trying to access, so having appropriate permissions set is a key, using least privilege as the base for applying permissions. Not to forget auditing those permissions and their access is also a must to ensure access is being evaluated appropriately.
There are many factors that need to be surfaced in order for the IT department to be able to understand how their staff are authenticating and being authorised to access corporate data or service.
As we discussed earlier that businesses are facing a lot of threats not just from external sources but internal ones as well, including rouge admins (whom hold the key to the kingdom!). Implementing identity management is important in the era of cyber wars, having services such as Azure AD that integrates and compliments your on premise AD enables you to detect and prevent suspicious logon’s by taking all the above into consideration.
Azure AD uses Machine Learning in the core to look at billions of signals received to learn and detect anomalies, conditional access would also complement this solution, through understanding the context and risks of sing ins and provide the right access.
How can you start protecting yourself?
Identity management life-cycle management is a key topic, policies to enforce strong passwords but also making it easier for users to remember them without the need to write them on a sticky note and leave them on their laptop, or even better
The use of multi-factor authentication, so just a password isnt enough anymore. How can I verify my staff identities? With something they are (i.e. username), something they remember (i.e. password) and something they have (i.e. phone or physical token).
Some of the points above might not be news to you, but ensuring appropriate policies are in place with audit trail and appropriate assessment of access is a must, through assume breach approach.
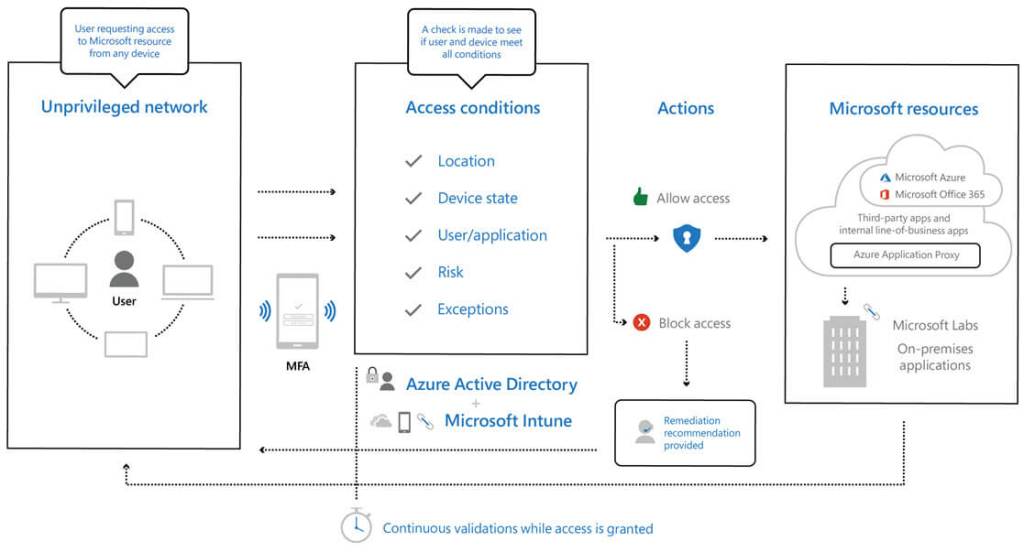
The high level architecture above shows level of security taken by corporations such as Microsoft to secure their assets and services, Microsoft doesnt take it lightly when it comes to security, it’s the heart of their service of which Microsoft Azure, Microsoft 365 and Dynamics 365 are built.
As shown through the simplistic architecture above, the extensive use of Azure AD services such as MFA, Conditional access, in addition to enrolling devices into Microsoft Intune to manage device health would ensure that access is traced and authorised appropriately. This approach would provide a cloud scale and an enterprise grade service.
Its important now days to minimise the blast radius when it comes to a compromise, by minimising lateral movements through the appropriate use of network segmentation, using encryption through all user access sessions and between different tiers, in addition to using analytics to get visibility and drive threat detection and improve defences such as Azure Sentinel.
Using this as the core topic for our next discussions, by building security and zero trust model in the core of our design offerings.
Update!
It has been a while since I posted a blog article, I have been busy since joining Microsoft to refocus my efforts and learnings to make the biggest impact for our clients and partners. During this time I have gained few certifications along the way to aid me in my journey.

I am planning on blogging on few topics which I see has a major traction currently in the market.
So, watch this space 🙂
ARM Templates vs Terraform

We get asked why do we use one over the other, I see a lot of discussions made around this topic. I can say there is no definitive answer, it all depends on your internal strategy and human capabilities.
So, I hear you say, are there capabilities that puts one ahead of the other?
Azure Resource Manager (ARM) vs. Terraform templates:
- ARM is a declarative language as in it submits the entire “goal state” to ARM for deployment – but doesn’t store a state of your infrastructure deployment like Terraform does
- ARM template syntax is specific to Azure – not portable – Resources can be deployed to AWS, GCP and Azure alike using Terraform
- Azure resources released in ARM template first – Terraform catches on later
- Terraform plan checks the deployment behaviour before it deploys and displays any changes before it actually happen – ARM can wipe out infrastructure as quickly as it can create them – what I want to say here – have change control in place to avoid this happening to you 🙂
- Some people find Terraform easier to read and digest especially if those templates are moved between developers – Terraform gives you the flexibility of adding comments while this isn’t available in ARM
- Both languages lets you embed custom scripts (i.e. in other languages such as Bash, Powershell etc.) in your templates which gives Terraform the advantage when a resource API provider is not yet available in Terraform
- Terraform runs pre-flight checks which means you can avoid failed deployments – ARM doesn’t warn you and your deployment might fail half way through deployment
This is my unbiased take on the matter … at the end of the day a clear business strategy should drive those concerns around deployment language and pattern. DevOps mindset has changed, people need to adapt as technologies change and evolve.
Time for change

I have spent last few years focusing on Microsoft Azure while helping clients either on their first steps or expanding presence on Microsoft Azure . The journey has taken me through some interesting projects and challenges the business face today (i.e. elasticity/availability/global presence, among many more).
Ending the year, I am turning another page in my career. I am thrilled to say that I will be starting the new year joining Microsoft as a Cloud Solution Architect, part of the One Commercial Partner team. Working closely with our partners to grow their Azure practice, close any knowledge gaps and assist them in growing their business in the new cloud era.
I would like to use this opportunity to wish everyone Merry Christmas and Happy New Year!
Azure Key Vault Access Policies
 Azure Key Vault is used to safeguard system critical data, such as keys, secrets and certificates that are part of your infrastructure core operations.
Key Vault access is managed through two interfaces: management plane – this dictates access to the Key Vault itself but not managing its content which is based on RBAC model, data plane – this enables granular control of keys/secrets/certificates, which relies on Access Policy.
This brings us nicely to Access Policies which is meat of this article. I have had to deal with a situation lately while applying access policy for a colleague while a restriction is imposed on my Azure AD account (see example below)
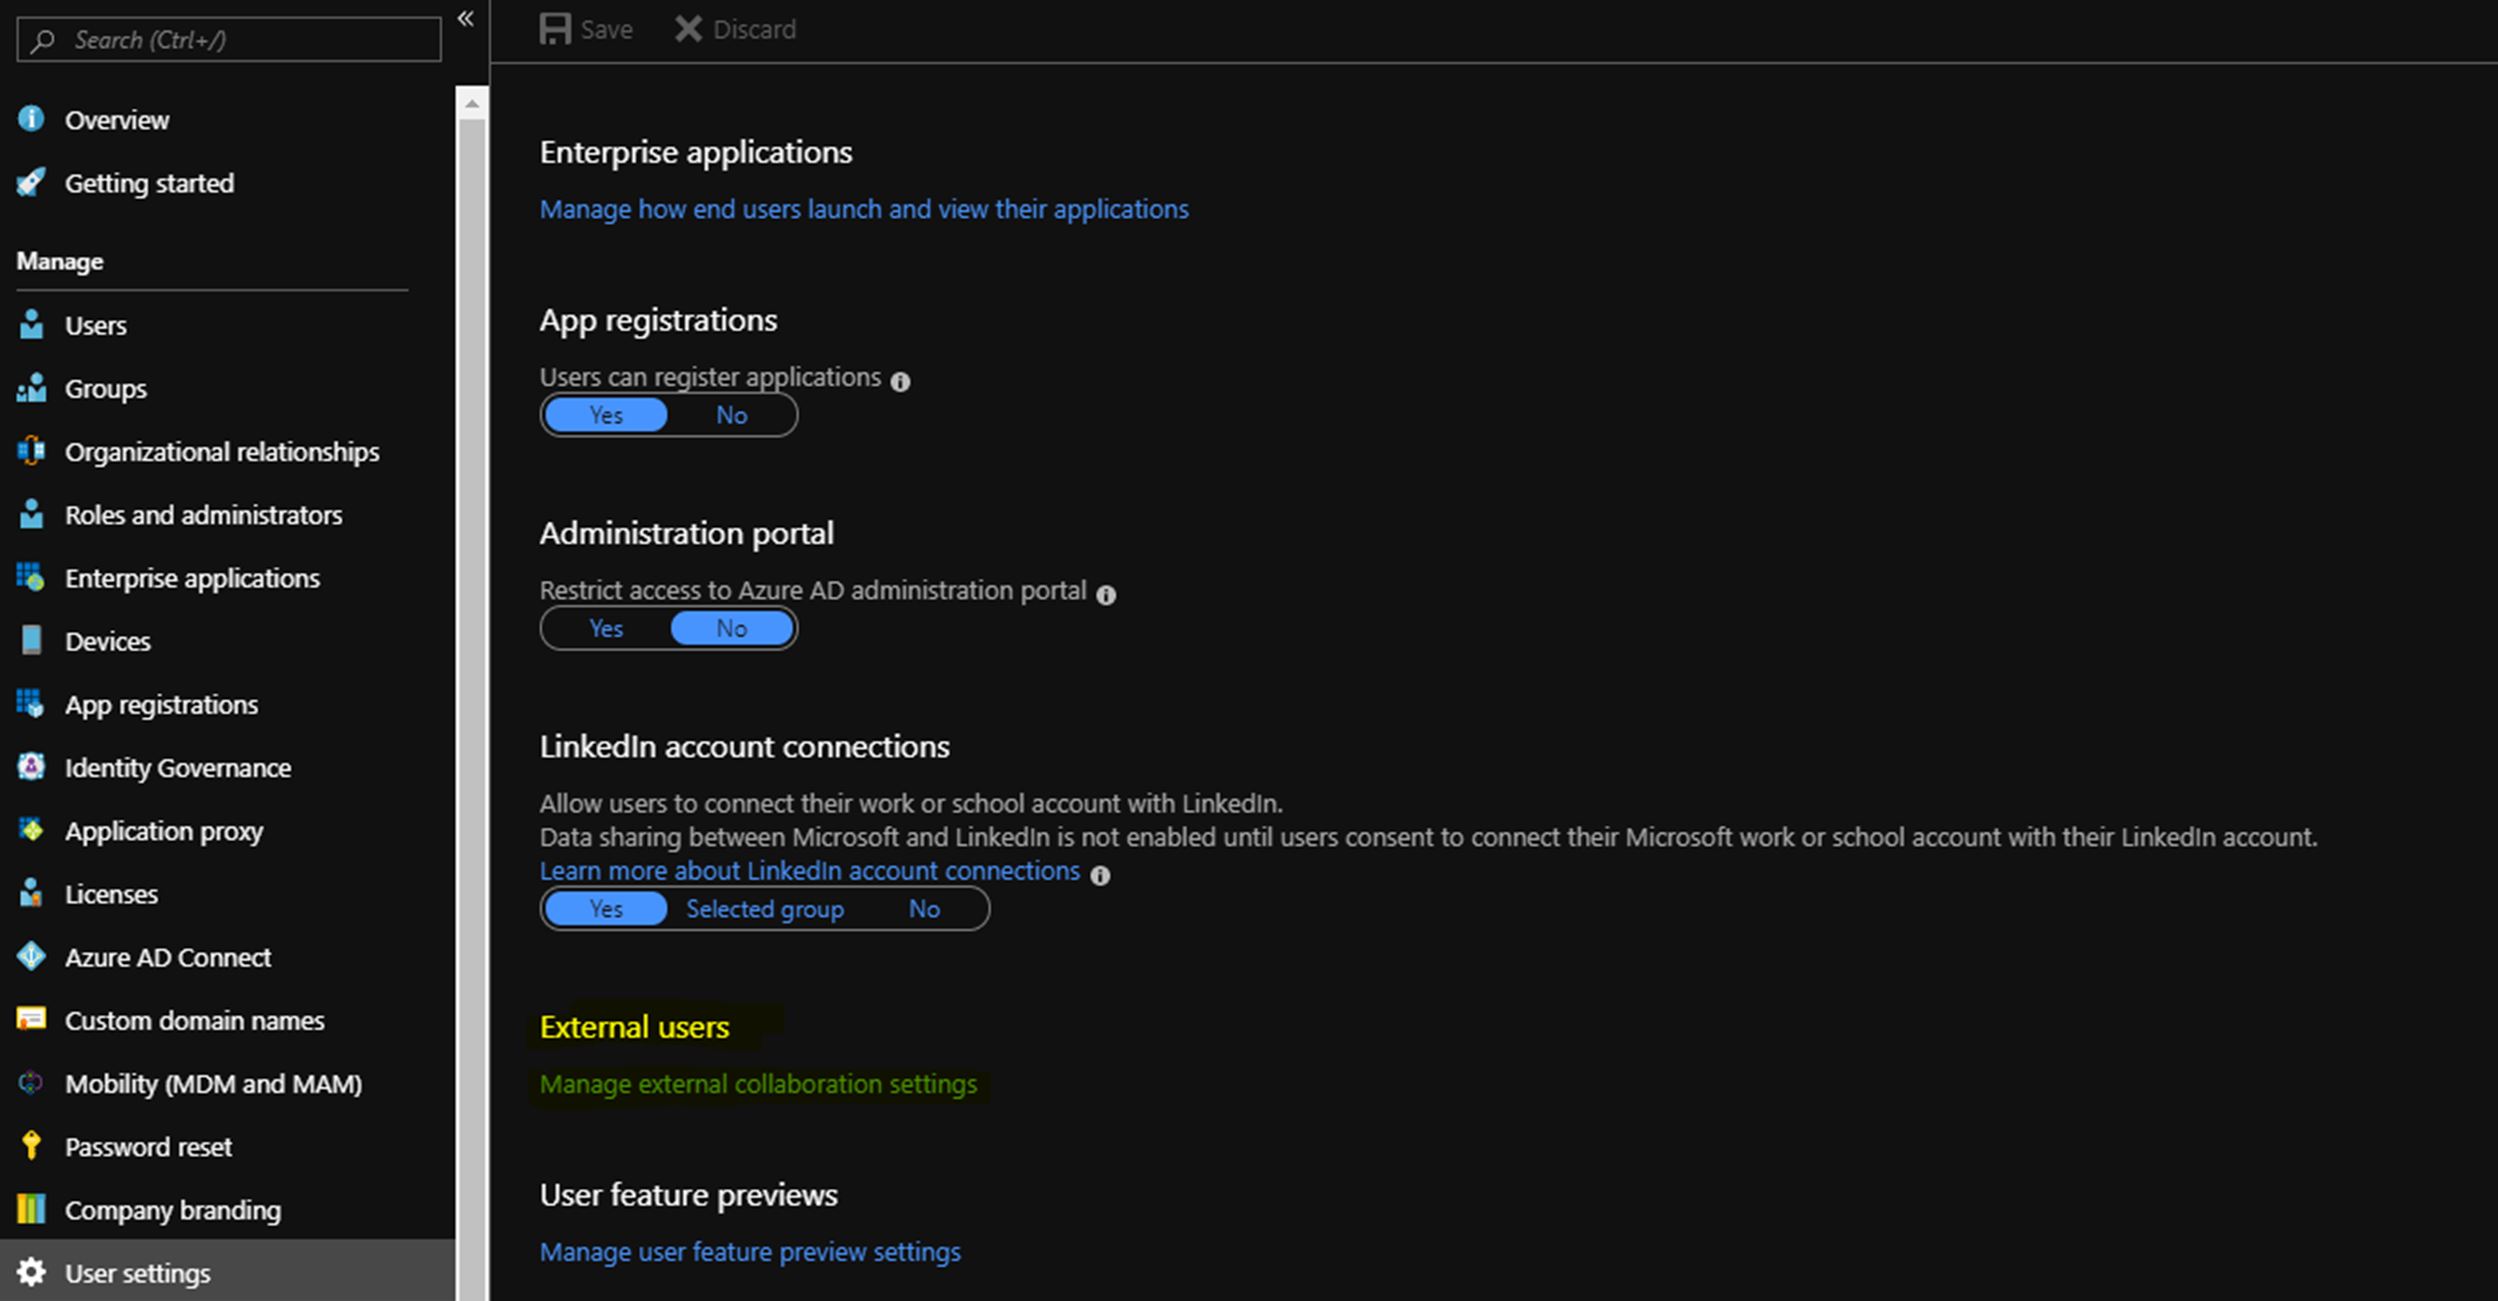
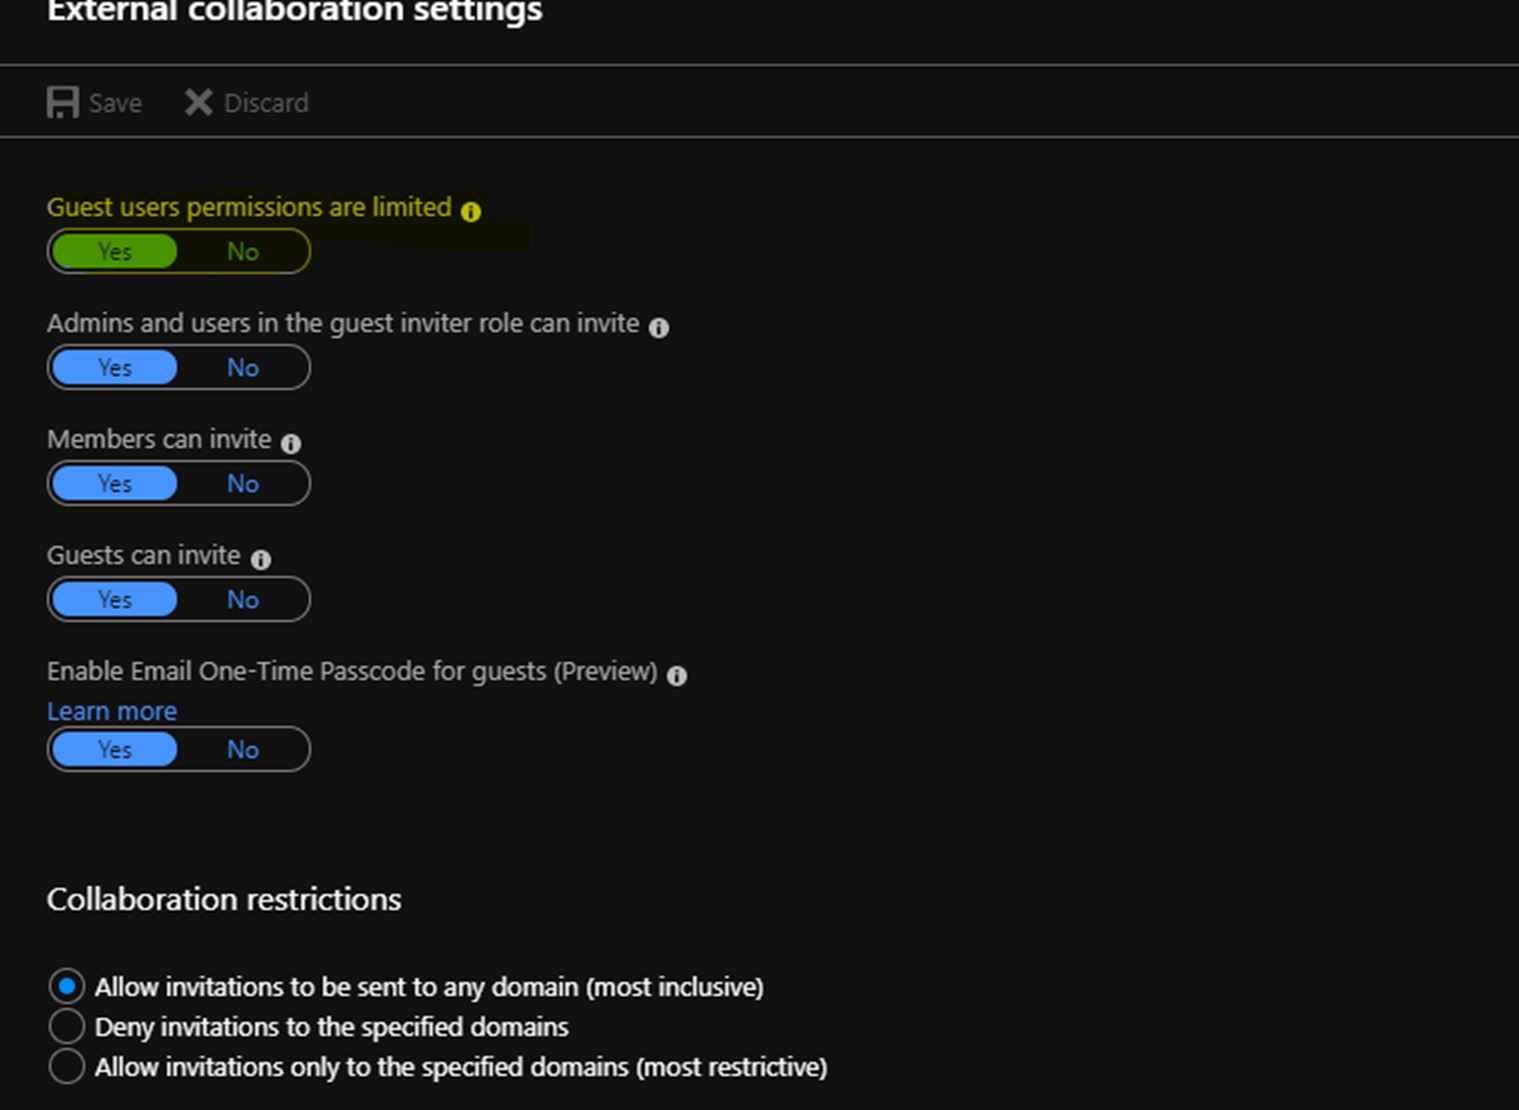
This would have limited access to my account (which is external) to AAD, which means I cant read or search AAD which is required when adding access policy via the GUI – Setting RBAC without access to AAD works (as an exception) if you know the full FQDN of the user you are adding.
The way around is to use PowerShell, but this requires a prerequisite which is the Azure AD object ID for the user you want to add, this can be achieved by adding them temporarily on management plane to access their user properties and copy object ID before deleting that rule.
Now to the command I used to apply that permission:
Set-AzKeyVaultAccessPolicy -ObjectId *** -VaultName **** -PermissionsToKeys **** -PermissionsToSecrets **** -PermissionsToCertificates **** -BypassObjectIdValidation
Key property here is the BypassObjectIdValidation, if the Object ID exists in AAD then it will be linked and the user will have their access policy applied to Azure Key Vault.
Azure Custom Script Extension
It has been a while since I had the opportunity to blog. It has been a very busy period which is good in some ways …
Anyway, today I wanted to pick up on Azure CSE. Azure CSE is beneficial in many ways when it comes to configuring VM’s, installing application and making app configuration changes.
Normally, when running an Azure CSE for Windows, people do favour Powershell scripts which gives them the power (in the name) and functionality to do their configuration elements with ease.
The recent issue I faced with Powershell scripts are particularly around Invoke-Command which runs a script block inside the VM under VM System context. Those Invoke-Command statements were issued to install a sequence of applications and configure the app in a certain way.
My word of advice is to avoid using Invoke-Command and use Start-Process instead.
For example:
Invoke-Command -ScriptBlock { “C:\Temp\Setup.exe /q”}
You would think this would go and install that Setup.exe program, but it many cases it doesn’t and you find there is a missing element in your application sequence.
A better and more effective way of doing this is:
Start-Process “C:\Temp\Setup.exe” -ArgumentList “/q” -Wait
This would ensure running of the Setup.exe installer and waiting for finish flag before it continues with the rest of your Azure CSE script, which the Invoke-Command doesn’t offer.
Simple things like that would make you script neater especially in managing error/failure codes during the install of the application.
To be honest, I would prefer the DSC way if you have the time and knowledge.
Windows 2016 with Containers
Posted by Sam in Azure, Containers, Windows 2016 on 3 April, 2018
Windows 2016 has a feature to add Windows and Hyper-V containers, both with their own advantages and limitations but I am not going to go over that in detail here. Below is a diagram that shows the architecture of each implementation and as we can see straight away that the Kernel is shared when using Windows Server Containers, hence it can only run Windows based instructions. This implementation doesn’t provide any security boundaries between containers as it exposes instructions of a container to the host and to all other VM’s, I wont go to comparision.

What I wanted to go over is a recent deployment that I have gone through which experienced some unusual behaviours.
Using Windows Server 2016 with Containers image from Azure gallery, provisioned a new Windows 2016 host, but that host on completion was missing Host Network Service (HNS network adaptor), this adaptor will be used for any communication that is external to the host, for example accessing the Internet.
The host was showing that Docker host network was bound to an adaptor that wasn’t showing in Network Connections and as you know that we don’t have access to see the status of that network adaptor on the host VM.
Using commands below I managed to clear Docker network settings and bring that network adaptor back online.
Using Powershell ran under admin credentials:
Stop-service hns
Stop-service docker
Get-ContainerNetwork | Remove-ContainerNetwork -force
Get-NetNat | Remove-NetNat
Start-Service docker
Your containers should have Internet/External access.
Gain access to SQL
Posted by Sam in SQL Server on 19 March, 2018
Have you had instances when your DBA left you with a DB that no one has SA access rights to?
For any instance of Microsoft SQL install, including SQL Express, there is a mode which would enable a local admin on that SQL server machine to gain/assign access to DB.
There are few steps which you have to follow:
1. Stop all SQL services
2. Start a command prompt with Admin permissions
3. Navigate to:
C:\Program Files\Microsoft SQL Server\MSSQL14.SQLEXPRESS\MSSQL\Binn
4. Run:
sqlservr.exe -m “Microsoft SQL Server Management Studio” -s SQLEXPRESS or any SQL instance name
5. Start SQL Server Management Studio as local admin and assign relevant groups/users access to DB
